As most of the world knows, Microsoft has made available a consumer preview of Windows 8. While this is still considered beta software, I highly recommend you check it out. Some of us technology minded folks are charged with supporting legacy software, developed with Visual Studio 6 (particulary Visual Basic 6), and with the iminent release of Windows 8, there is some worry about whether our support tools will work with it. This tutorial will (hopefully) help you get VB6 installed on your Windows 8 system!
First off, I highly recommend you test this on your non-production machine. As with all beta software, strange things can happen. If you fry your system, don’t hold me responsible! I am just passing on what has worked for me. This description might be a little verbose, but I would suggest that you at least read through it once before proceeding. That way you can pick out the bits that pertain to you. Also, I may have included some unecessary steps, but like I said, this is the process that worked on my test system.
Test system specifications
The following system was used to test this procedure:
- Dell Latitude E6410
- 4GB RAM
- Intel Core i7 @ 2.67 gHz
- Windows 8 Consumer Preview (64-bit) (fully patched)
No other software has been loaded on to the system. It’s fully stock. Your results and process may vary for 32-bit systems, or if you have installed any other software, but should work. If not, it should give you a good starting point. Insert the disk into the drive (or mount the ISO), after which autorun should detect the disk, and ask for action, at which point you should ignore or dismiss it.
First Thing
Be sure to create the zero byte file for MSJAVA.DLL, as described on this supporting page. If you don’t you’ll at the very least be forced to reboot after the installation of a very old version of Java. I’ve also seen where the Java install gets “stuck”, in that Java tries to install every time you run setup, and forces a reboot every single time, due to the inability to completely install. So, do yourself a favor, and create the zero byte file. It only adds a minute to your process, and it’s worth it.
Change compatibility settings
Hold the Windows key and press the letter E to open Windows Explorer. Browse to the CD/DVD drive where you have inserted the disk, and right click the setup.exe application to run the program as Administrator. Check the checkbox under Compatibility mode, and select Windows XP (Service Pack 3) under the Run this program in compatibility mode for: heading. Click Apply, then Ok. Back in Windows Explorer, open the Setup folder on the CD-ROM, and change the compatibility mode for the ACMSetup.exe using the same method.
Step through the Wizard
- UAC
- Yes
- Program Compatibility Assistant
- “Run the program without getting help”
- Installation Wizard
- Next
- End User License Agreement
- I accept the agreement
- Next
- Product Number and User ID
- Enter product number
- Enter Your name and Your company’s name
- Next
- Setup Options
- Install Visual Basic 6.0 Enterprise Edition
- Next
- Choose Common Install Folder
- default location; change if needed
- Next
- Program Compatibility Assistant
- ACMSetup is run at this point to actually install VB6
- Select “Run the program without getting help”
- Visual Basic 6.0 Enterprise Setup
- Click Continue on the opening screen.
- Click Ok at the bottom of the Product ID screen
- pause while setup searches for installed components
- Choose the installation you want
- I selected custom for this installation. For the options, I chose Microsoft Visual Basic 6.0 and Active X. Ensure Data access components is deselected. If it’s not deselected, setup will hang!
- change path if desired. I used the default path
Setup will go through a few steps, and eventually complete.
Some Final Tweaks
Back in Windows Explorer, browse to the path that you install VB6 to. If you stuck to the defaults, the path should be:c:\Program Files (x86)\Microsoft Visual Studio\VB98
Right-click the VB6.EXE program, select properties, then go to the Compatibility tab. At the bottom of the window, click the Change settings for all users button. Put a tick mark in the check box, and make sure the Windows XP (service pack 3) option is selected in the drop down.
You’ll also want to put a check mark in the Disable display scaling on high DPI settings and the Run this program as an administrator check boxes, towards the bottom of the window.
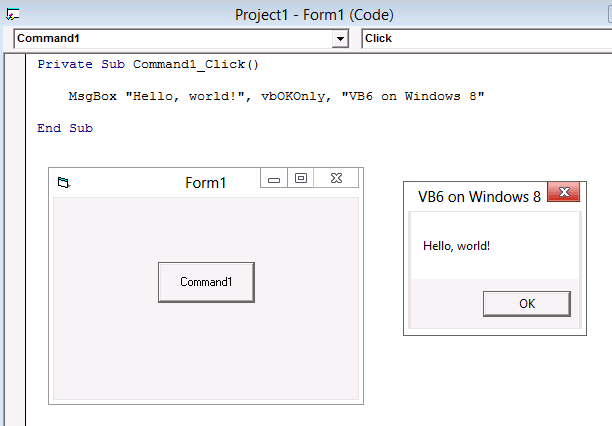
Finally click Apply, then Ok, then Ok again. Now, you can go ahead and close you miscellaneous Explorer windows, and head back to your Start tiles. In that list, you should see a Microsoft Visual Basic 6.0 icon in the list.
Click that bad boy, and enjoy the legacy goodness!